Full of Stitches

Monday, January 26, 2009

MissC’s Gift

img wwdollkit

I purchased the Kit, Chloe & Louise pattern from Wee Wonderfuls to make up for MissC's birthday. She's been 'helping' me along the way! From stitching the legs on (she wasn't as interested in the arms) to sewing the hair on -then using the little arms to pat and show off the doll's hair! I hope I tacked down the hair well enough, I'm sure we'll find out soon.

I used Pink Chalk's tutorial to help hide the ends of the eyes, nose, mouth and heart. The last french knot freckle just didn't want to stay surfaced, so she has 5 1/2 freckles :) . Her eyes are blue, hair is "Pumpkin" (Lion Brand wool, we'll see how well that washes!), and she has a little letter "C" in her heart (just in case I need to remember whose doll belongs to whom). I've cut the Chloe dress (finished, but for snaps; in photo) and the Louise shirt from one Fat Quarter, and the Kit dress is done (except for snaps/hook&eye & embroidery) from two matching fabrics.

img wwdollkit

I'll run her through the wash tonight and see how she comes out! MissC will meet her when she wakes!

Labels: ,

MissC’s Birthday

Today's little MissC's second birthday. We celebrated Saturday with Ben at Chuck E. Cheese's. Her favorite was the carousel.

img ccarouselbday img ccarouselbday

We had a little cake & ice cream later at home.

img ccakebday img childrenccakebday

Happy Birthday, 2 year old.

Labels: ,

Saturday, January 24, 2009

Play Road Doll Quilt

I saw the idea for a quilt with a road on Wee Wonderfuls blog. I thought what a fun idea it was and pulled out quilt books till I found a drunkard's path pattern.

I did one trial run with the arch added and the girls got excited: "It's a road, with a strawberry farm in the middle!" That's when I saw I had to modify it because the paths don't match up exactly on adjoining squares like a road needs to. The block size is 4" (plus seam allowances), and I only had to adjust the smaller corner by 1/4". This gives me a 1" road surface on this size block, which seems a little narrow for most play cars.

img dollcarquilt

The other day, T.J. let me know he wants me to make him a little doll quilt for when he "has to" play dolls with his sisters, since the older two girls both have quilts now. No problem. I've made up a few squares to try out the pattern, so if I make this one 4x5 squares, it'll turn out about 16"x20" and be right in the ballpark of the size quilts I've made the girls.

I pulled out scrap paper and drew a grid (4"x5") and jotted down what I'd done so far and planned out my road. Next comes cutting the remainder of the quilt and getting it sewn!

Labels:

Friday, January 23, 2009

Rocket

Note to self: check if a fabric is stretch before cutting into it!

I tried the Rocket Man pattern at The Long Thread and was disappointed with how fat the rocket turned out. I hadn't realized that it was stretch denim, and it turned out really wide. Next time, I'll have to line it if I use a fabric like this so that it's not so round. I'm thinking that I'll have to add a booster rocket on bottom to get it to sit right. The extra girth pushed the wings out of proper alignment and now they bend instead of resting on the ground.

img rocketmanthelongthread

I don't have the eggman, but I did add the pocket. The kids'll like to put toys in to ride the rocket. It's actually easier than pi to get the hole. Trace the object that's going into the rocket (I used the base of a serger spool), Now you've got your basic circle:

For the entrance on the rocket body, you'll need to add the seam allowance INSIDE the circle. I simply traced the spool onto the rocket and then drew a circle 1/4" within that one for the seam allowance.

For the plug at the end of the pocket, you'll need to add the seam allowance to the OUTSIDE of the circle. So, on the fabric for the inner end of the pocket, I traced the circle onto a scrap and then drew a circle 1/4" around that one.

For the depth of the sleeve, you'll make a rectangle. Measure around the object (cm or in, whatever your preference) and decide on the depth of the pocket. My spool was 4 3/4" around, so I added 1/2" (1/4" seam allowance on each side) to get 5 1/4" for the width. I had a scrap that worked that was only about 2" long, so my pocket ended up about 1 1/2" deep.

I hope that's helpful if you make up this patten!

Labels:

Doll Quilts

After making the pillow the other day, I made another four pillows, and the girls wanted quilts for their dolls. We swung by a quilt store, then Michael's on the way home and picked up a bundle of bright fat quarters. I cut out a bunch of 2.5" squares and had the girls help me set the patterns: rainbow and 9 patch. Pink and blue for MissA, purple and green for MissB (I'll have to get better pictures, these are really washed out looking):

img pinkdollquilt img purpledollquilt

The nice thing about showing my work off on the blog is that you can't see how terribly I missed the lines when trying to 'stitch in the ditch' to quilt them! And, the green stripe on MissA's pillow cases is because I didn't double check how wide to make the cuff and cut it an half inch too narrow. I cut an inch of green to make up for it (the 1/2" plus seam allowances). MissB looked at my first quilting job and pointed out where I'd gone off the line into a green square.. Thanks, kid. These were fun and quick -a 2 or 3 day project. I've already got the next two or three ideas for quilts in my head! Ah well, must be the nesting hormones or some such!

Labels:

Monday, January 19, 2009

Making Linens

img RsOliveDoll

I made these dolls nearly two years ago (from Wee Wonderfuls Olive and Archy Make Along Story -the pattern of which I've somehow lost or deleted!). The one for one of my nieces I sent off right away and her mom (my DH's sis) sent a cute photo of her sleeping with it. The other has been sitting. Waiting. Because I know my brother and his wife would be extra touched if I put a face on it (I'm not much into finishing things, right? So, faces often get left off toys). Finally, in the wee hours this morning, after finishing a couple toy slings (child-sized doll carriers), I gave her a stern looking at and added her features. I think she came out alright, though her eyes aren't the same size or shape exactly. But, I'll get this gift out before my dear niece outgrows dolls! (yeah, she's only like 3 now, but I still have to put it in a box and ship it) And, now that I've done that one, I want to do MissB's doll's face; which she drew on in ink and could either use extra cleaning or highlighting.

img dollpillowcase

I found this neat doll bedding tutorial while looking on flickr. I made a pillow and case just to try it out. I have a feeling there will be a bunch of these once the girls find the first. Super simple, super cute, and it's a good size for many of their dolls.

(photos when I find his phone again.. pics up.)

Labels:

Buttoned Apron

img hohapronsmallF hohapronsmallB

A few days ago, I purchased the Girl's Buttoned Apron made by Hint of History patterns from Modest Handmaidens -I've been thinking of getting this pattern since I first saw it (she got it here nice and quick!). It's SO cute! I made the smallest size for little MissC (who will be 2 in a little over a week) and she helped pick the button and didn't want to take it off for nap -it's a post button, and I didn't want it poking her. (As soon as Ben gets back and MissC's awake again, I'll get a picture with his phone! pics posted!)

img hohapronpockets

This is why I made the apron! MissC has been sticking her hands down her pants and claiming, "Pocky" this week!

MissB is sewing buttons onto her doll. I have to make a little apron next for her doll to wear, too. Updated: downloaded the 6" doll apron pattern, doubled the bib's size (I only used the bib piece, just measured around the doll and added SA for the waistband, then made the skirt 1.5x that width), and increased the strap length:

img hohdollapron img hohdollapronB

Labels:

Friday, January 16, 2009

Scheduling: Prep for a Newborn

With illness and recovery over the last month, we've been floundering with schooling. It's time to get into the practice of rest! The new addition is due in about 9 weeks, give or take, and I would like to continue schooling at a comfortable pace. I pulled out my MOTH book a few days ago and began praying and jotting down what we'd like to be able to do. Today, the children and I forged a basic schedule to try out.

I've included a basic nursing schedule. My baby's generally nurse every 2-3 hours for the first year or two. For the moment, I have 'rest' times scheduled for that time so the children will become used to me withdrawing to nurse before the baby arrives (and maybe I'll actually rest a little). After the nursing/rest times, we added the afternoon nap -"rest and read" for older children- and our meals. I'm on prep work with a rotating helper (as in each child takes a turn; but knowing them, they'll be spinning around the whole time, too) and the children help with the cleanup.

Next, I started working in classes. An half hour here to split between the girls for phonics, another there for Math or Grammar.. An hour with all the children for Science or History. Fill in a playtime with a sibling while I'm working one-on-one with another child.

On days out, we'll simply try to pick up whenever we are once we're home.

I don't have everything I'd like to on the schedule yet, but this is a time to rest and focus. I'll be able to rotate activities through the week and add more in a couple years.

Labels: ,

Wednesday, January 14, 2009

31ish Wks

img 31wks
My messy mirror shot - 31ish weeks, who knows, baby will arrive when it's time. Everything's measuring fine, so we're on for March.

The midwife asked if we have birth supplies. "We have scissors and towels," I replied, what more do we need?

Yesterday, my camera broke. (sigh) Again.

Labels:

Tuesday, January 06, 2009

“B- Carrying An Egg”

img bdrawing

My children love to draw. Sometimes, I have to ask what the drawings are, but they're shown off with pride. LasT night (MisSC'S HELPING ME TYPE), I couldn't sleep. SO, I thougHT ABOUt how TO add THE hair ON thE DOLl. THEN, I REMemBered A drAWing THAT'S bEEN ON mY DEsk since LAST summer. MissB drew it and when I asked about it, I was told it's, "B-- carrying an egg." I pulled it out and taped the egg basket back to the body and started cROCHeting.

I came up with this:
img bdoll

With how round the character is, I decided on a ball for the body. Any drawing could easily be rendered in yarn as a flat pillow (make a matching front and back and stitch together) or as a handpuppet! The egg in the bag is an elongated ball, the basket simply chain 5 loops connected with sc. To keep the egg inside, the bag is closed with sc. And, to keep it becoming lost, the basket was held between stitches and is not removable.

It only took about 5 hours in all. T.J. got up this morning and pulled out his computer to draw me something to make him (he emailed it, I'll have to see for sure, but I think it's a dragon) while cheering me on to finish. I used the loop stitch for the hair and I think it came out well. I'm thinking of adding it to Ravelry as "Children's Drawings" under the toys category. If you do one, send me a comment so I can check it out!!

Labels: ,

Monday, January 05, 2009

Pulling My Doll Hair!

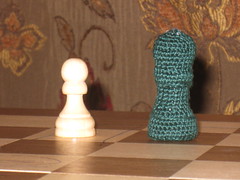
I get sidetracked easily. Especially when I'm under the weather (and I have been since the 1st!), so I've been couch directing the children and crocheting. I've got an idea stewing for those chess pieces, just have to work and write it out..

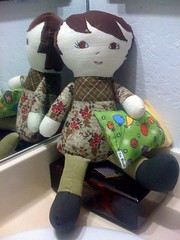
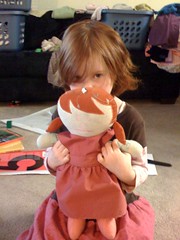
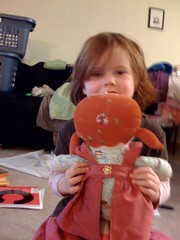
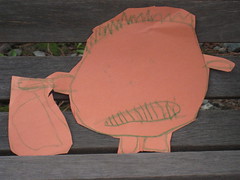
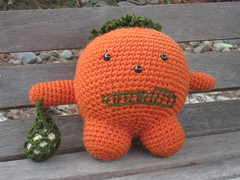
Then I came across a 
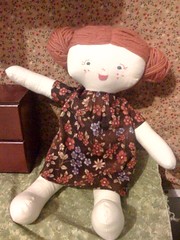
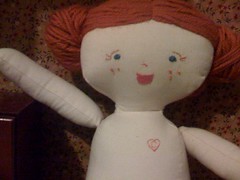
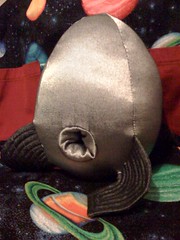
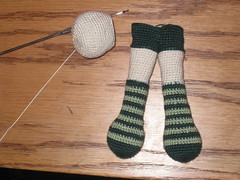
doll pattern and have been focused on that to let the other idea stew nicely. She's cute and cuddly, but I'd like to make a more pocket-sized version, so I'm working her in thread. I started following the pattern for the legs (but didn't do her jogless stripes this time) and instead of making them smaller at the top, I made them wider. I mean, aren't yours? Then, I simply joined the legs in the round and started in on the body. I was working on the shorts and thought since I'd joined the legs, I might as well join the arms.. But then I'd need to do the arms first so that I can just decrease with the body for the shoulders.. Then I thought, no, I'll just start the head and continue on the body, increasing for the shoulders and split it in three for arms and body. That's when it hit me that I don't have any eyes this small (unless I want to embroider them), and that I ought to connect the hair, too, before I close off the head.

img doll legs

So, I started looking for hair ideas. I googled, I scanned the listings and came up with a few ideas. Generally, there seems to be the idea that latchhooking the yarn on is okay (though I remember my share of piles of yarn that I'd pulled out of simple knots like that). I read on a Ravelry page that a fellow Ravelrer's doll has 8 strands knotted together with 2 strands pulled through at the hairline and 1 strand through the back (so with the knot in the middle, I figure that puts the hair going out a minimum of 8 holes?). NeedleNoodles.com has a page on how to add fringe hair (broomstick lace/chain style) to heads. Owly has an Amigurumi hair tutorial -heavy on the pics for us visual learners! As well as a link to a step-by-step of long hair on flickr! ClipClip has a tutorial on several styles of amigurumi hair. There are some that make wigs just of crochet, and others that teach a basic curling technique. And, that prompted a memory of a bear pattern I'd pulled out of a Family Circle magazine (11/2/93) that used the Loop Stitch to make the fur.

Well, that's a whole bunch to try out! Maybe I should make a basic doll recipe to try all these out on!?

Loop st: Insert hook into next st, wrap yarn from back to front around left index finger, keeping it in front of work, yo; pull yarn through st; slip loop off finger; adjust size of loop by gently pulling yarn. Hold loop in place with middle finger, wrap yarn around hook; draw yarn through all 3 lps on hook.

Labels:

Saturday, January 03, 2009

Pawn

I was looking at patterns and came across this utube video of a chess set a lady made for her father. Neat! My husband and son like to play and the pieces aren't generally toddler friendly. Like that set is, what with the size of the pieces.. So I googled 'pattern chess set knit crochet' and came up with one that isn't available any more. So, I picked up a pawn, a penny, a #5 hook, and some green #10 thread and started stitching.

Ben and the children got home and he looked at me sideways like and asks what I'm doing. 'Crocheting.' A little while later, he walked by and saw the half form by my hook and sweetly says, "Fou dans la tête." Sure, but aren't we all sometimes?

img pawn

(update: found a knitted chess set)

Labels: